
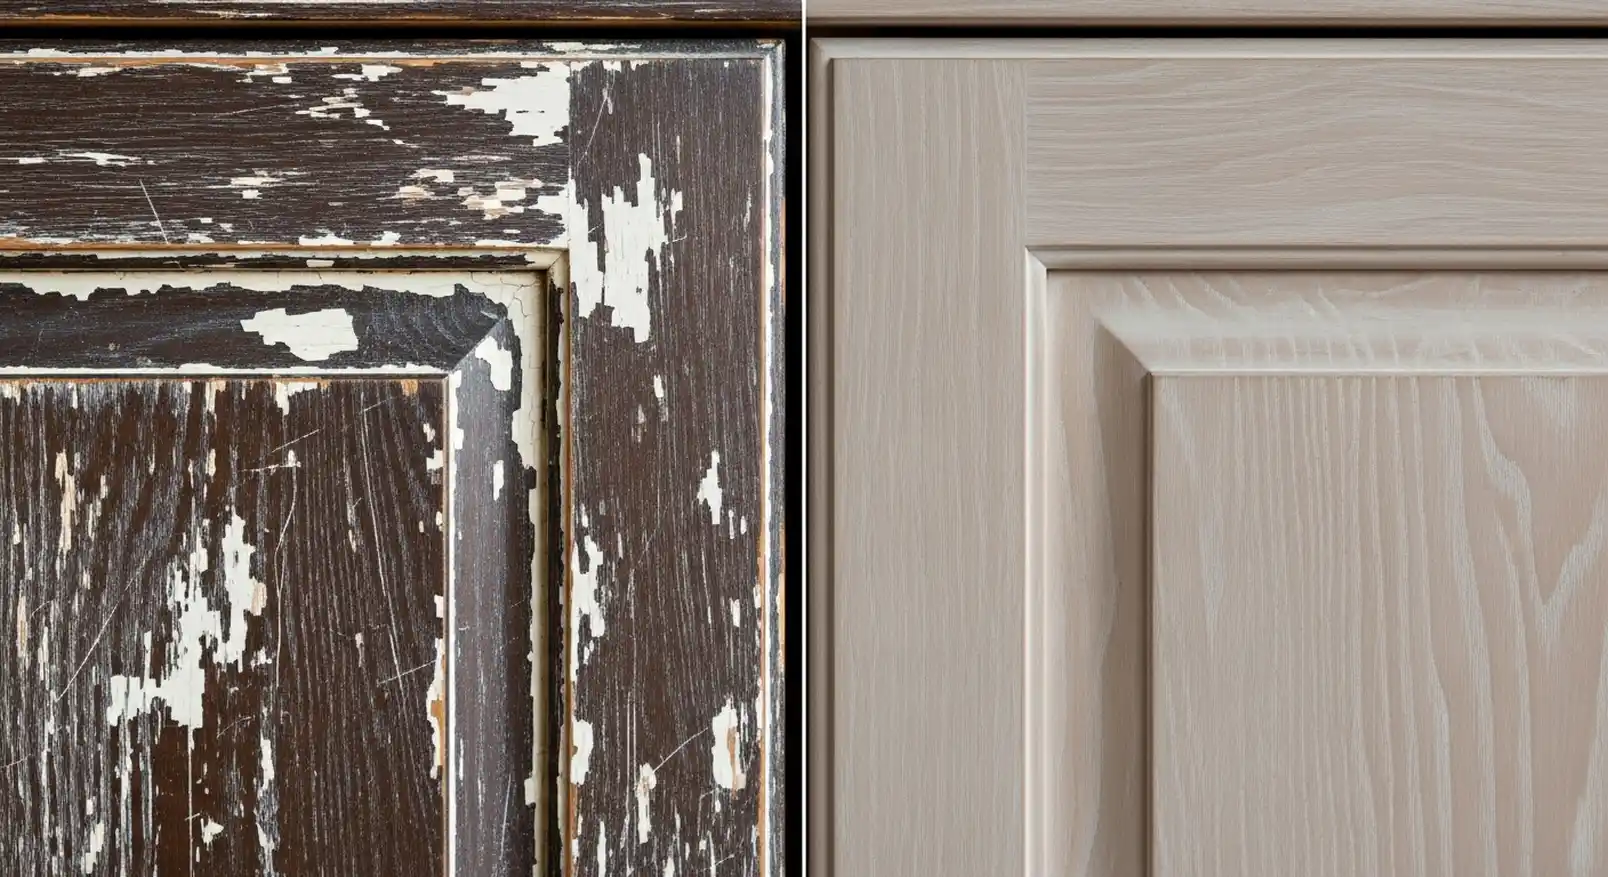
If you look at your kitchen cabinets and feel like they have lost their shine, sanding is the first step to bring them back to life. I’ve learned that a smooth, well-sanded surface is the key to getting that flawless, professional finish everyone admires. No matter how expensive your paint or stain is, it won’t look right unless the surface underneath is properly sanded.
Sanding might sound like a tiring job, but once you get the hang of it, it becomes simple and even satisfying. You don’t need to be a professional to do it right. All you need is patience, the right tools, and a little guidance. By learning how to sand cabinets correctly, you can transform dull, rough surfaces into smooth, clean ones that look brand new.
In this guide, I’ll walk you through everything I’ve learned about sanding cabinets at home. You’ll find easy steps, practical tips, and a few tricks that make a big difference. By the end, you’ll have the confidence to sand like a pro and give your cabinets that perfect finish you’ve always wanted.
Why Sanding Makes or Breaks Your Cabinet Project
If you’ve ever seen a paint job peel or look patchy after just a few months, chances are the surface wasn’t sanded properly. I’ve made that mistake before, and it taught me one thing sanding decides how good your final result will look and how long it will last. It’s not just about removing the old finish; it’s about preparing the wood so it can hold paint or stain evenly.
When you sand your cabinets, you open up the pores of the wood. This helps the new finish stick better and look smooth instead of blotchy or streaky. Without sanding, paint sits on top of old layers and starts chipping off easily. That’s why skipping this step often leads to disappointment, no matter how carefully you apply the paint later.
Sanding also helps you uncover the true texture of your cabinets. It removes small scratches, grease marks, and dents that can make the surface uneven. The smoother your base, the more professional your cabinets will look once you’re done.
So before you rush into painting or staining, take your time with sanding. It’s the foundation of a lasting, beautiful finish and once you see the difference, you’ll never want to skip it again.
Grab Your Gear: Tools and Materials You’ll Need
Before you start sanding, gather all the tools and materials you’ll need. Having everything ready makes the process smoother and saves you from stopping midway. I’ve learned that good preparation makes a huge difference in how easy and effective sanding feels.
Let’s go over what you’ll need to do the job right.
Essential Sanding Tools
- Sandpaper: Keep a range of grits, usually 100, 150, and 220. These help you move from rough sanding to a smooth finish.
- Sanding block or sponge: Perfect for corners and flat spots where your hand gives better control.
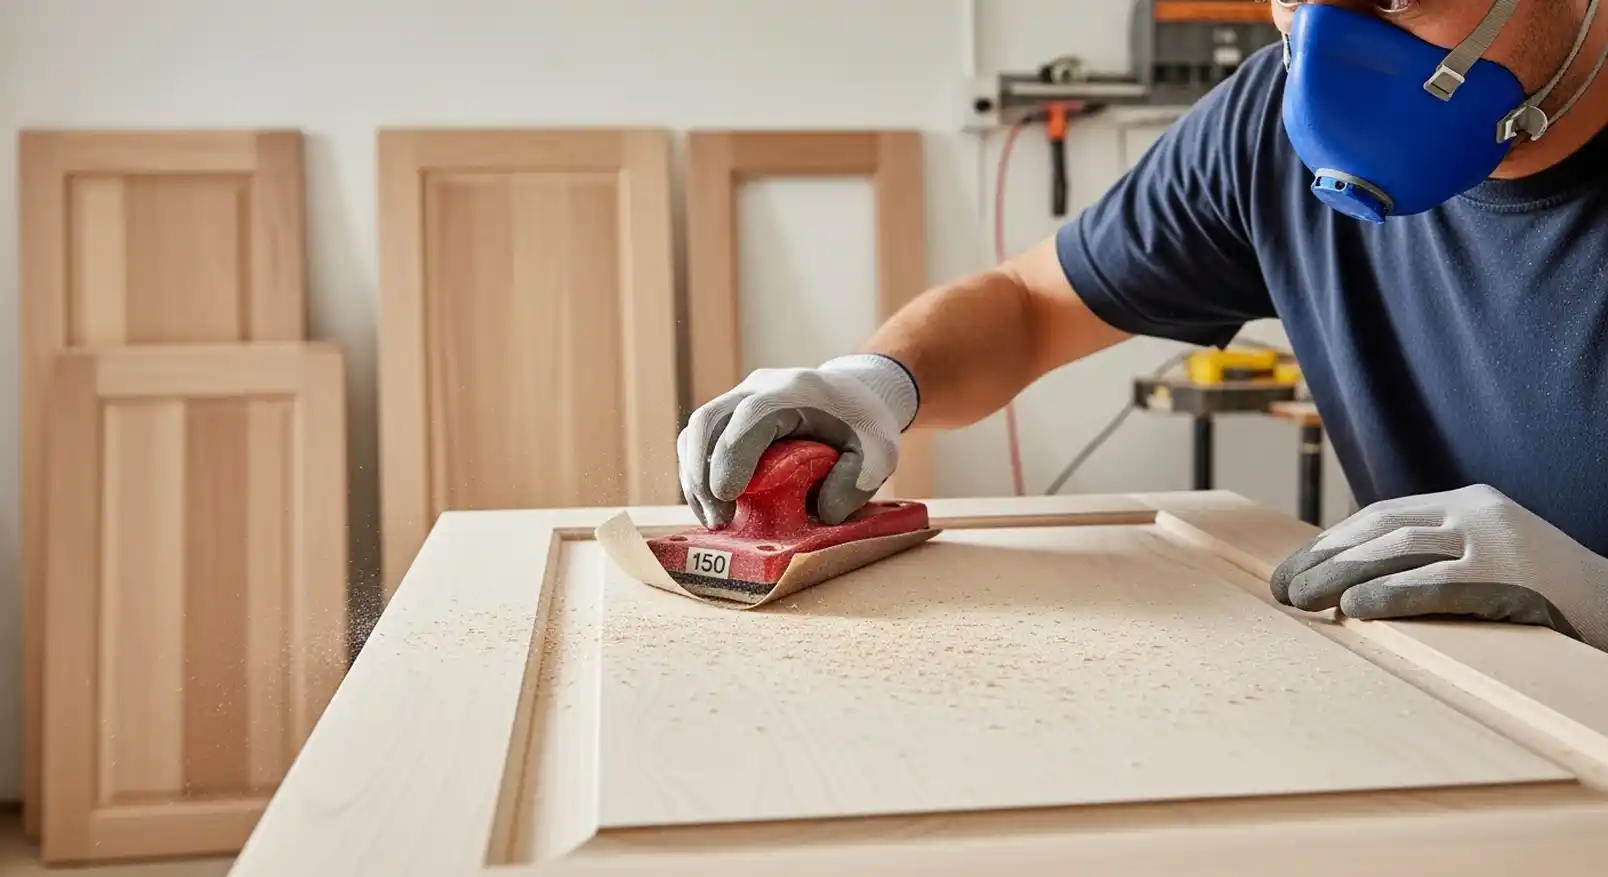
- Orbital or palm sander: If you’re working on a large set of cabinets, this tool saves time and effort while keeping the surface even.
- Vacuum or tack cloth: You’ll need these to remove dust between sanding stages.
Safety Gear
- Dust mask: Prevents fine dust from getting into your lungs.
- Safety glasses: Protects your eyes from wood particles.
- Gloves: Keeps your hands comfortable and free from splinters.
Optional Extras
- Degreaser or cleaner: Helps remove oil or sticky residue before you begin.
- Drop cloth or plastic sheet: Protects your floor and nearby surfaces from dust.
- Liquid deglosser: A quick helper for glossy finishes that are tough to sand.
Once your tools are ready, clear your workspace and make sure you have good lighting. You’ll need to see every detail while sanding. A little preparation now will save you plenty of frustration later.

Sandpaper 101: Choosing the Right Grit for the Job
Choosing the right sandpaper grit is one of the most important steps in sanding cabinets. I’ve learned that using the wrong grit can either damage the wood or waste a lot of effort without giving good results. Once you understand how grit numbers work, picking the right one becomes easy.
What the Grit Numbers Mean
Sandpaper grit tells you how rough or smooth the paper is. The lower the number, the rougher the sandpaper. Higher numbers mean a finer, smoother grit.
- 80–100 grit: Best for removing thick paint or old finishes.
- 120–150 grit: Ideal for smoothing out rough patches and preparing for finer sanding.
- 180–220 grit: Perfect for final sanding to create a soft, even surface before painting or staining.
I usually start with 100 grit if the surface is old or has multiple paint layers, then move up step by step to 150 and 220 for a silky finish. Skipping grits often leaves scratches that show up later, so take your time moving through each stage.
My Go-To Grit Progression
- Start with 100 grit to remove old paint or varnish.
- Move to 150 grit to smooth the surface and even out any marks.
- Finish with 220 grit for that clean, touchable smoothness that feels ready for paint or stain.
Common Grit Mistakes to Avoid
- Don’t start with a very fine grit if your cabinets still have old paint it will clog quickly and slow you down.
- Don’t use very rough grit on thin veneers it can sand through the top layer easily.
- Never jump straight from coarse to fine. Each grit prepares the surface for the next one.
Once you pick the right grit and move in order, you’ll notice how much smoother your cabinets feel. The finish will go on evenly, and the wood grain will show beautifully.
Step-by-Step: How to Sand Cabinets Like a Professional
Once you’ve gathered your tools and chosen the right sandpaper, it’s time to start sanding. This is where the real transformation begins. I’ve followed these exact steps many times, and they always give clean, smooth results that make the final finish look professional.
Step 1: Remove the Doors, Drawers, and Hardware
Take off all cabinet doors, drawers, and handles before you start. Label each piece with tape so you’ll know where it belongs later. This makes sanding easier and keeps your finish even. Leaving the hardware on can scratch your surface or ruin your sandpaper.
Step 2: Clean the Surface Thoroughly
Use a mild degreaser or dish soap with warm water to remove any grease or grime. Dry the cabinets completely before sanding. Any leftover oil or dirt will clog your sandpaper and leave uneven spots.
Step 3: Begin with a Coarse Sand (Around 100 Grit)
Start sanding with 100-grit sandpaper to remove the old finish, paint, or varnish. I usually use an orbital sander for large flat areas and a sanding block for edges and corners. Move your hand in the direction of the wood grain. Don’t press too hard; steady pressure gives better control and prevents scratches.
Step 4: Smooth It Out (150 Grit)
Once the old finish is off, move to 150-grit sandpaper. This step smooths the surface and removes any marks left by the coarse grit. Wipe the surface with a tack cloth or vacuum between grits to remove dust.
Step 5: Final Sand for a Silky Finish (220 Grit)
Use 220-grit sandpaper to give your cabinets that soft, even feel. I always spend extra time here because this step decides how smooth the paint or stain will look later. Run your hand across the surface it should feel perfectly even.
Step 6: Clean the Dust Completely
Once sanding is done, wipe everything with a tack cloth or a slightly damp rag. Pay attention to corners and grooves where dust often hides. A clean surface helps your finish stick better and look more polished.
Step 7: Inspect and Touch Up
Look over your cabinets carefully. If you spot rough patches, lightly sand them again with fine grit. Once everything feels smooth, you’re ready to paint or stain.
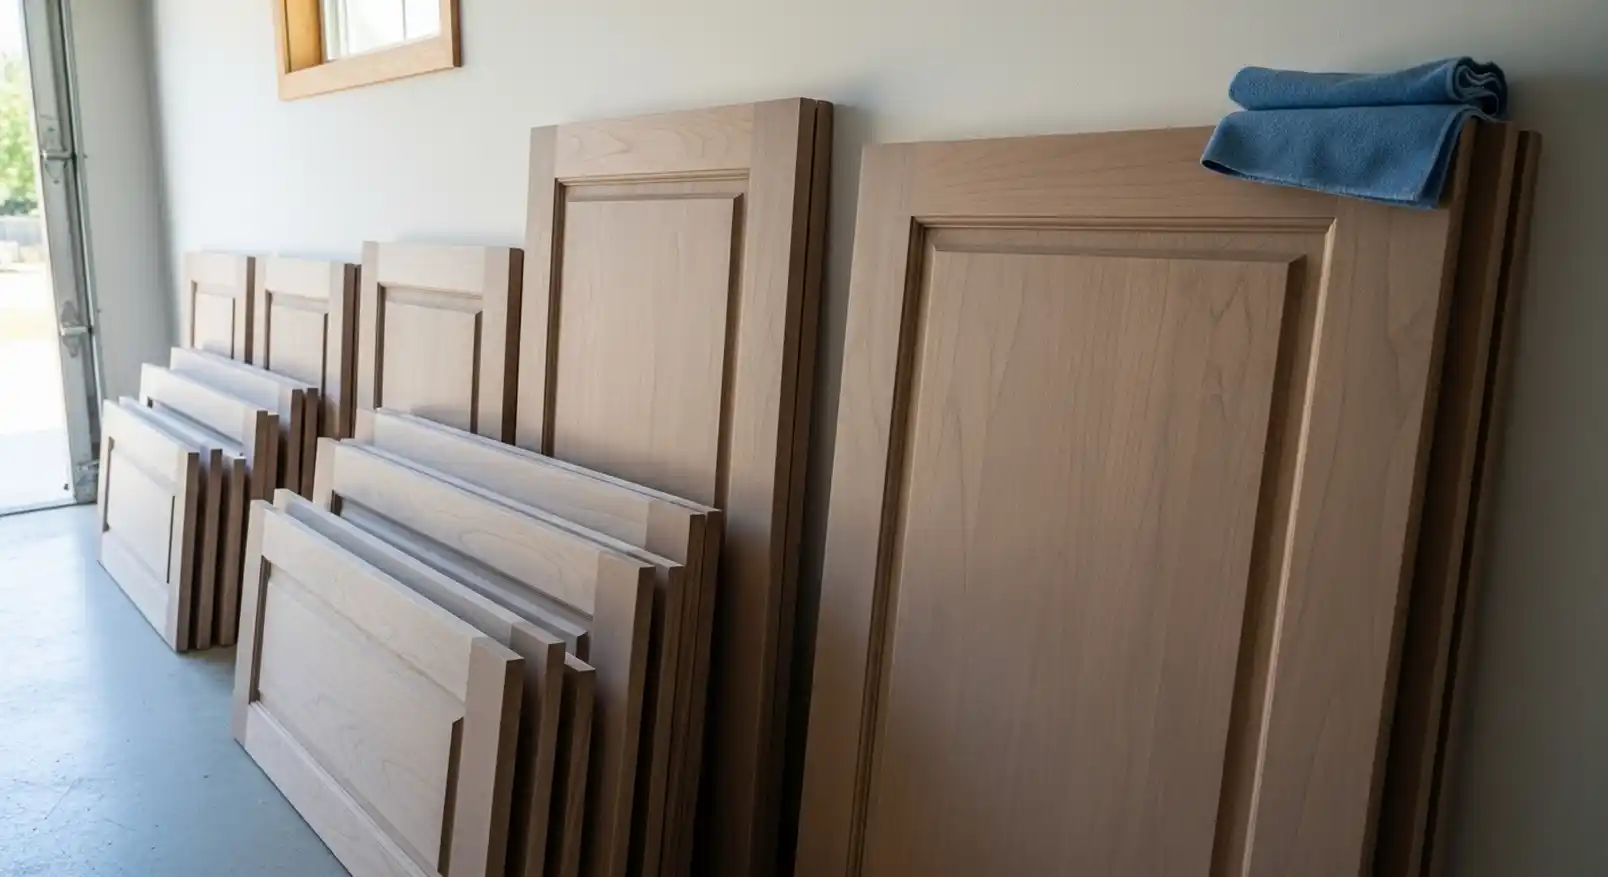
By following these steps patiently, you’ll end up with cabinets that look smooth, even, and ready for a new life. It’s a process that takes time, but once you see the final result, you’ll know it’s worth it.
Different Materials, Different Rules
Not all cabinets are made of the same material, and I learned early on that each one reacts differently to sanding. The way you sand a solid wood cabinet isn’t the same as how you should handle veneer or MDF. If you know what type of cabinet you’re working on, you can adjust your sanding approach to protect the surface and get better results.
Sanding Solid Wood Cabinets
Solid wood is the easiest to sand and the most forgiving. You can use a range of grits, starting with 100 and moving up to 220. Always sand in the direction of the wood grain. Going against it can leave visible scratches that show up after painting or staining.
If you notice any dents or small marks, light sanding usually fixes them. For deep scratches, you can fill them with wood filler before moving on to finer grit.
Sanding Veneer Cabinets
Veneer cabinets have a thin layer of real wood on top of a different base material. The challenge here is thickness sanding too hard can easily wear through the veneer. I always use gentle pressure and start with a higher grit like 150 to avoid damage.
Use a sanding sponge or block for more control, and check your progress often. Once you remove the shine and smooth the surface, stop sanding. Overdoing it can ruin the finish completely.
Sanding MDF Cabinets
MDF (medium-density fiberboard) is smooth but delicate. It doesn’t handle aggressive sanding well, especially on edges. Use a very fine grit, around 180 to 220, and move lightly. If you break through the top layer, the surface will absorb paint unevenly.
Instead of heavy sanding, I prefer using a liquid deglosser to dull the surface. This makes paint stick well without risking damage to the material.
Sanding Laminate Cabinets
Laminate isn’t real wood, so sanding won’t help much to remove the surface layer. The goal here is just to create a bit of texture so the primer can grip better. Use fine sandpaper, around 220 grit, and lightly scuff the surface. You should see a dull finish, not deep scratches.
Knowing your cabinet material before sanding saves time and avoids costly mistakes. Once you adjust your method for each type, you’ll always get a clean, even surface that’s ready for a perfect finish.
Conclusion: Smooth Cabinets, Stunning Results
Sanding your cabinets might seem like a small part of the job, but it’s the step that decides how your final finish will look. I’ve learned that when you take your time and sand the right way, even old, worn-out cabinets can look completely new again. It’s all about patience, the right tools, and paying attention to detail.
By now, you know how to prepare your surface, pick the right grit, and handle different cabinet materials. Once you start applying paint or stain, you’ll see how much that careful sanding pays off. The surface will look smooth, clean, and professional.
So don’t rush through it. Put on your dust mask, grab your sandpaper, and take it step by step. In just a few hours, you can turn dull cabinets into something you’ll be proud to show off every day. A perfect finish always starts with perfect sanding.